Once an item sells, shipping is the next step — and over time I’ve settled into a simple setup that lets me pack and ship eBay orders from home without overthinking it.
By the time an item sells, most of the work has already been done. Good photos, accurate descriptions, and fair pricing all help get the sale. Shipping is simply the final step in delivering a good experience to the buyer.
This isn’t a warehouse or a professional shipping station. It’s just a practical system that works consistently, keeps costs down, and makes shipping easy enough that it doesn’t slow me down.
Below is exactly how I handle shipping and the basic tools I use every day.
Where I Ship From
I ship everything from a small desk area at home. It’s not a permanent shipping station, but it’s organized enough that everything I need is within reach.
When something sells, I don’t have to hunt for supplies or clear space. I can pack the item, print the label, and set it aside quickly. That alone makes a big difference when you’re shipping regularly.
Having an organized workspace also means I spend less time looking for supplies and more time listing inventory. If you’re curious how my entire workspace is arranged, take a look at My Actual eBay Setup (The Tools and Layout I Use Every Day).
The Core Shipping Supplies I Use
My shipping setup is built around a few simple items that cover most situations.
Poly Mailers (Most of My Orders)
Most of the items I sell fit into poly mailers. I buy them in bulk, which keeps the cost per package very low. Buying larger quantities makes sense if you ship often, but even smaller packs are inexpensive.
Poly mailers are lightweight, durable, and great for keeping shipping costs down.
Choosing the right packaging is only part of the equation. Pricing your items correctly also helps you account for shipping costs while remaining competitive. I explain how I approach that in How I Price Almost Everything on eBay (Without Overthinking It).
Bubble Wrap for Protection
Before putting items into a poly mailer, I wrap them in bubble wrap. The bubble wrap I use is perforated every foot, so I can tear off exactly what I need without cutting.
I also reuse shipping materials whenever possible. Boxes, padded envelopes, and poly-style mailers from my own deliveries get saved and reused for shipping smaller items. Anything clean and sturdy enough to protect an item gets another use.
Reusing materials keeps costs down, and over time it adds up.
Small savings like reusing clean shipping supplies may not seem like much, but over hundreds or thousands of orders they can make a noticeable difference to your overall profits.
Boxes (When Needed)
For items that won’t fit safely into a poly mailer, I use boxes. Most of the boxes I use are simply saved from my own deliveries, especially Amazon boxes.
Almost everyone receives packages, and saving a few clean boxes in common sizes can cover most larger shipments without spending extra money on new boxes.
I also reuse cardboard to build my own triangular packages when I sell posters. I show exactly how I make them in How I Ship Posters on eBay Without Damaging Them.
Shipping Scale
A small digital shipping scale is essential. I use it to weigh packages before purchasing labels so there are no surprises with postage costs.
Accurate weights help avoid underpaying for shipping and prevent issues later. Even a basic, inexpensive scale works fine as long as it’s consistent.
Accurate package weights also help prevent unexpected postage adjustments, which is one more reason I never skip weighing an order before buying the label.
Tape Dispenser and Desk Tools
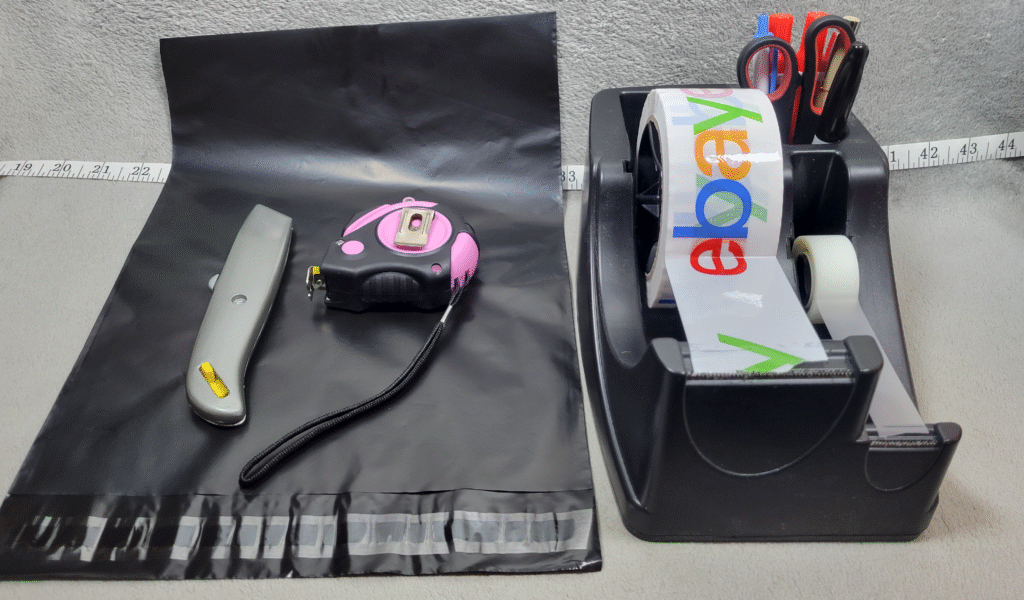
On my desk, I use a combo tape dispenser that holds:
- Standard 2-inch packing tape
- Smaller clear tape
- A built-in holder for tools
In that holder, I keep:
- Scissors
- Pens and markers
- A Sharpie for labeling
I also keep a tape measure and a box cutter on my desk at all times. Having these tools within arm’s reach speeds things up and keeps packing from feeling scattered.
If you want to see exactly how I use those supplies once an electronic sells, I break down the process in How I Pack Electronics for eBay (My Simple Shipping Process).
Why This Setup Works for Me
This setup works because it’s simple and repeatable. I don’t need to think about how to ship each order — the process is always the same.
When something sells:
- Weigh the item
- Wrap it in bubble wrap
- Pack it in a poly mailer or box
- Seal it, label it, and set it aside
There’s no guesswork, and that keeps shipping from becoming stressful.
Building simple systems like this has allowed me to process thousands of orders without feeling overwhelmed. The less mental energy you spend deciding what to do next, the easier it is to stay consistent.
A Note for Beginners
If you’re just starting out, you don’t need everything at once. A basic setup is more than enough:
- Packing tape
- A small shipping scale
- Poly mailers or boxes
- Bubble wrap
For boxed items, crumpled paper from magazines or packing paper can work in a pinch. For poly mailers, bubble wrap provides better protection.
You can upgrade your setup gradually as you sell more. The goal isn’t perfection — it’s making shipping easy enough that you don’t avoid listing items.
I also recommend starting with used shipping supplies whenever possible. Many new sellers think they need to buy everything brand new, but recycled boxes and clean packing materials can save money while still protecting your items.
Final Thoughts
Shipping from home doesn’t need to be complicated or expensive. A small, organized setup can handle most eBay orders efficiently and consistently.
Keeping things simple has helped me ship regularly without overthinking each sale.
As your business grows, you’ll naturally upgrade certain tools, but the basic process probably won’t change very much. A repeatable system is worth far more than having the most expensive shipping equipment.
New to Reselling on eBay? Start Here
If you’re new to reselling, these articles walk through the exact process I use every day, from listing your first item to shipping it safely.
- My Simple Photo Setup for eBay (What I Actually Use)
- My Simple eBay Listing Workflow (From Item to Listing)
- How I Price Almost Everything on eBay (Without Overthinking It)
- What I Do After an Item Sells on eBay
- My Actual eBay Setup (The Tools and Layout I Use Every Day)
- How I Source Inventory for eBay