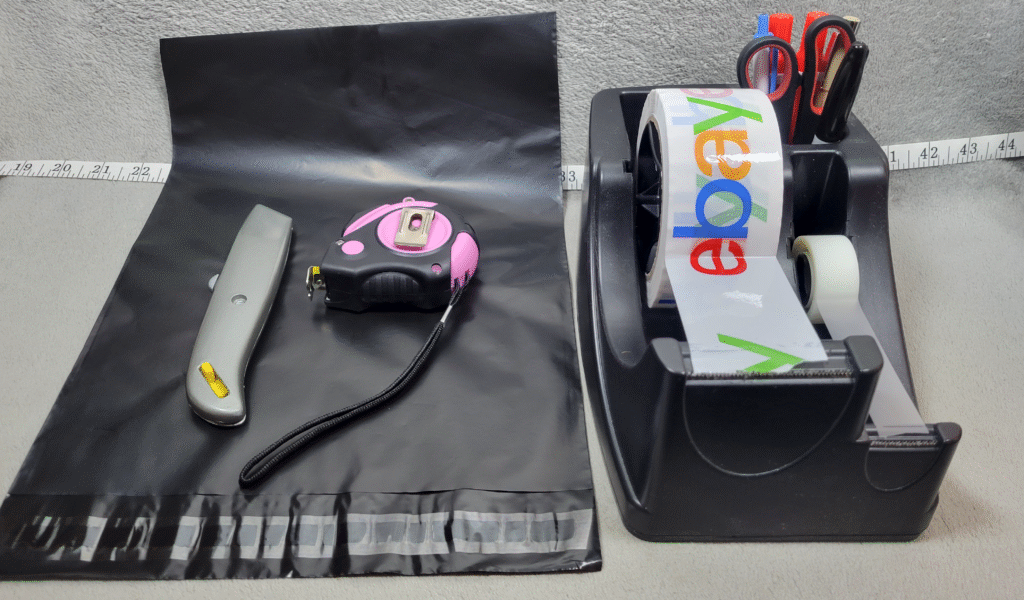
I don’t sell posters constantly.
I’ve probably shipped around 20 of them over the years — maybe one every couple of months rather than one every week.
But when I do sell one, I use basically the same packing method every time.
So far, I haven’t had one arrive damaged.
My method may be a little overkill, but that’s intentional. I’d much rather use a little extra cardboard and tape than have a poster arrive crushed or bent.
And interestingly, I don’t use a traditional round poster tube.
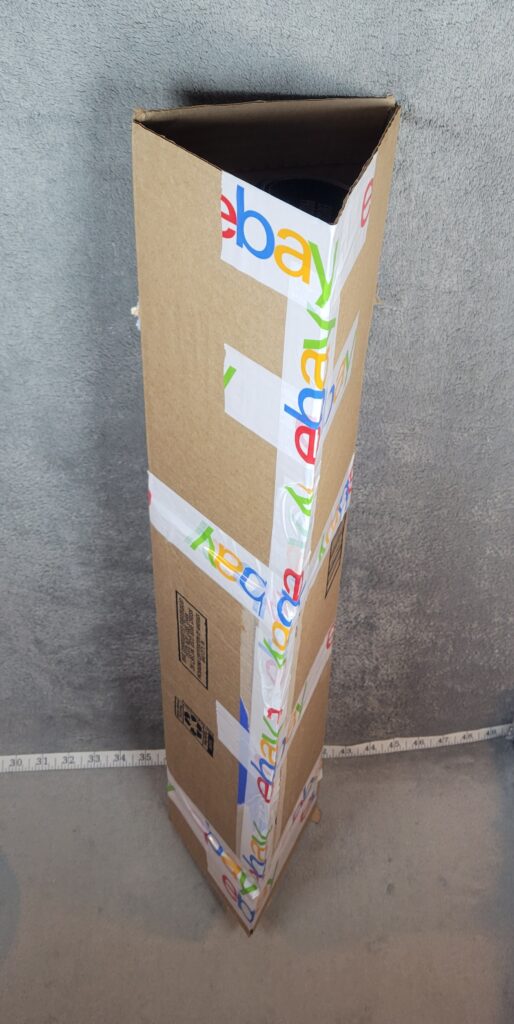
I make my own triangular shipping tube out of cardboard.
Here’s exactly how I do it.
Most of the Posters I Sell Are Already Rolled
Most posters I deal with are already stored loosely rolled.
They’re not tightly wound around a cardboard core or taped into a roll.
They’re just rolled naturally enough to keep their shape.
That’s how I want them when I start packing.
I don’t tape the poster itself.
I don’t want adhesive anywhere near it.
I simply set the rolled poster aside while I build the outer package around it.
I Make My Own Triangular Shipping Tube
The package I use is basically a long triangular cardboard box.
Think of a long triangle-shaped mailer rather than a round tube.
I start with a regular cardboard box that I’m able to open or cut apart into a large flat piece of cardboard.
Then I lay the rolled poster on top of the cardboard so I can measure how long the package needs to be.
I normally want the cardboard to extend roughly half an inch to an inch beyond the poster on each end.
That gives me a little extra room to protect the ends without making the package unnecessarily long.
Once I have the length figured out, I cut the cardboard down to size.
Then I Score the Cardboard to Create the Triangle
Next comes the part that actually creates the package.
I usually measure somewhere around five or six inches from one edge of the cardboard.
Then I score the cardboard lengthwise.
My box cutter has a scoring wheel on the other end — it looks a little bit like a tiny ridged pizza cutter.
It doesn’t cut all the way through the cardboard.
It weakens the cardboard along a straight line so I can make a clean fold.
I’ll score one line, fold the cardboard, then measure another five or six inches and score another line.
Eventually I’m creating three long sides that fold together into a triangular shape.
The exact measurements don’t have to be perfect.
The important thing is that the rolled poster fits comfortably inside without being crushed.
I Usually Use More Than Three Layers of Cardboard
Once I’ve created the basic triangle, I don’t necessarily stop after exactly three panels.
If I have enough cardboard left, I’ll wrap another panel over the first side.
Sometimes I’ll even go around farther than that.
That gives the finished package another layer of cardboard and makes it considerably stronger.
Once the shape is established, I cut off whatever excess I don’t need and tape the long seam so the triangle stays together.
One thing I like about this design is how rigid it feels.
Once the cardboard is folded into that triangular shape, you can pick it up and squeeze it.
It’s surprisingly difficult to crush compared with a loose flat piece of cardboard.
I don’t need to make a scientific argument about why the triangle is strong.
I just know that after making these packages repeatedly, the finished tube feels extremely solid in my hands.
I Test the Fit Before Putting the Poster Inside
Before I seal anything permanently, I make sure the poster will actually fit.
I’ll form the triangle, slide the poster in temporarily, and make sure there is enough room around it.
I don’t want the poster wedged against the cardboard.
It should slide in easily while still being protected by the rigid outer package.
Once I’m satisfied with the fit, I take the poster back out so I can finish securing the tube.
Then the Poster Goes Inside
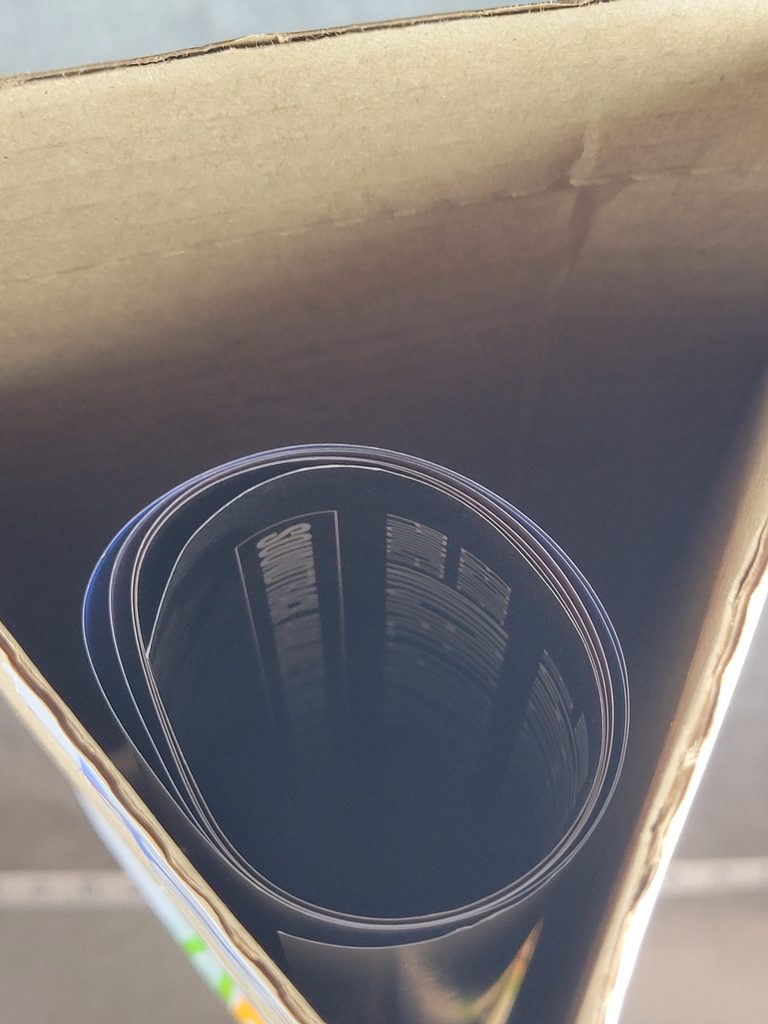
Once the triangular tube is built and taped along the long seam, I slide the rolled poster inside.
I don’t cram it in.
The poster should remain loosely rolled, just as it was before packing.
The package is there to protect the poster from outside pressure.
It shouldn’t create pressure of its own.
I Protect Both Ends With Tissue Paper
Because the triangular package is open on both ends, I don’t want the edge of the poster sitting directly against the taped end of the package.
I use lightweight tissue paper for this.
After the poster is inside, I’ll gently put a small amount of tissue paper into one end.
Then I do the same thing on the other end.
I’m not stuffing the tube full.
I just want a soft buffer between the poster and the ends of the cardboard package.
That also keeps the poster from sliding back and forth as much during shipping.
Then I Tape the Ends Shut
To close the package, I use regular wide packing tape — usually around two inches wide.
I’ll lay tape over the open end across two sides of the triangle.
Then I’ll come from another direction and apply another strip.
I’ll repeat that several times from different angles until the end is fully sealed.
Then I do the exact same thing on the opposite end.
When I’m finished, the poster is surrounded by rigid cardboard and the two openings are completely taped shut.
It’s a very simple package, but it feels extremely solid.
Weather Protection Is Easy to Add
I’ve personally never had one of these packages get wet enough that a buyer complained about moisture damage.
But I’ve only shipped around 20 posters, so that doesn’t mean water damage can’t happen.
If I’m worried about rain, snow, or moisture, it’s easy to add another layer of protection.
Before putting the poster into the triangular tube, I can loosely wrap the rolled poster in plastic.
That could be a clean plastic bag, a thin trash bag, or another lightweight plastic material I already have.
It doesn’t need to be vacuum-sealed or wrapped tightly.
It’s simply another barrier between the poster and moisture in case the outer cardboard gets wet.
I don’t think everybody needs to go crazy with this, but if weather is a concern, it’s a cheap precaution.
I Don’t Try to Make the Package As Cheap As Humanly Possible
A long poster package isn’t necessarily going to be the cheapest shipment in the world.
Depending on the size, weight, destination, and current carrier rates, shipping can cost noticeably more than mailing a small electronic.
That’s okay.
My priority is getting the poster there safely.
I’ve found that buyers may initially look at shipping and think it’s a little expensive.
But once they actually receive an extremely well-protected package, the cost tends to make more sense.
I’ve had the same thing happen with electronics.
I use a lot of bubble wrap and protection, and buyers have specifically mentioned the packaging in feedback.
They can see that I didn’t throw their purchase into the cheapest possible package and hope for the best.
That’s something I also talk about in How I Pack Electronics for eBay (My Simple Shipping Process).
I’d Rather Over-Pack Than Under-Pack
This applies to pretty much everything I sell.
Packing materials cost money.
Tape costs money.
A larger or stronger package can sometimes increase shipping cost.
But a damaged item costs more.
If a poster gets crushed, bent, torn, or wet, now I may be dealing with a refund, a return, or an item that has permanently lost value.
I’d rather use a little more cardboard and tape upfront.
I’ve taken the same approach with electronics, which is one of the reasons I tend to slightly over-protect packages rather than under-protect them.
I talk about some of those broader lessons in How I Avoid eBay Shipping Mistakes (What Actually Matters).
I Reuse Cardboard Whenever I Can
Another reason this method works well for me is that I don’t have to buy a specialized poster tube every time.
I already receive cardboard boxes from purchases and inventory.
As long as the cardboard is clean and sturdy enough, I can cut one open and turn it into the triangular package I need.
That keeps my packing costs down without sacrificing protection.
It’s the same general approach I use throughout my shipping setup: reuse good materials when I can, but don’t reuse something that’s too damaged or weak to protect the item.
You can see more of my overall setup in My Simple eBay Shipping Setup (How I Ship Orders From Home).
Why I Keep Using This Method
I haven’t shipped hundreds of posters.
I’m not a dedicated poster seller.
I’ve probably shipped somewhere around 20.
But I’ve used this same basic triangular-cardboard method repeatedly, and I haven’t had a poster arrive damaged yet.
That’s enough for me to keep doing it.
There may be fancier ways.
There are certainly ready-made poster tubes and mailers you can buy.
But I already have cardboard, tape, tissue paper, and the tools to make this package myself.
It works.
It’s strong.
And I don’t see any reason to complicate something that’s been reliable for me.
Final Thoughts
My poster-packing method is pretty straightforward.
I loosely roll the poster, cut a piece of cardboard slightly longer than it, score the cardboard into long panels, fold those panels into a triangular tube, add extra layers when possible, slide the poster inside, cushion the ends with tissue paper, and tape everything securely shut.
If I’m concerned about moisture, I’ll also put a lightweight plastic barrier around the poster before it goes inside.
That’s it.
I’ve only shipped around 20 posters, so I’m not claiming this is the one perfect way everybody needs to do it.
It’s simply the method I’ve actually used, and so far it’s worked every time.
For me, that’s a good enough reason to keep using it.
New to Reselling on eBay? Start Here
If you’re newer to selling and shipping on eBay, these are some of the other parts of my process: