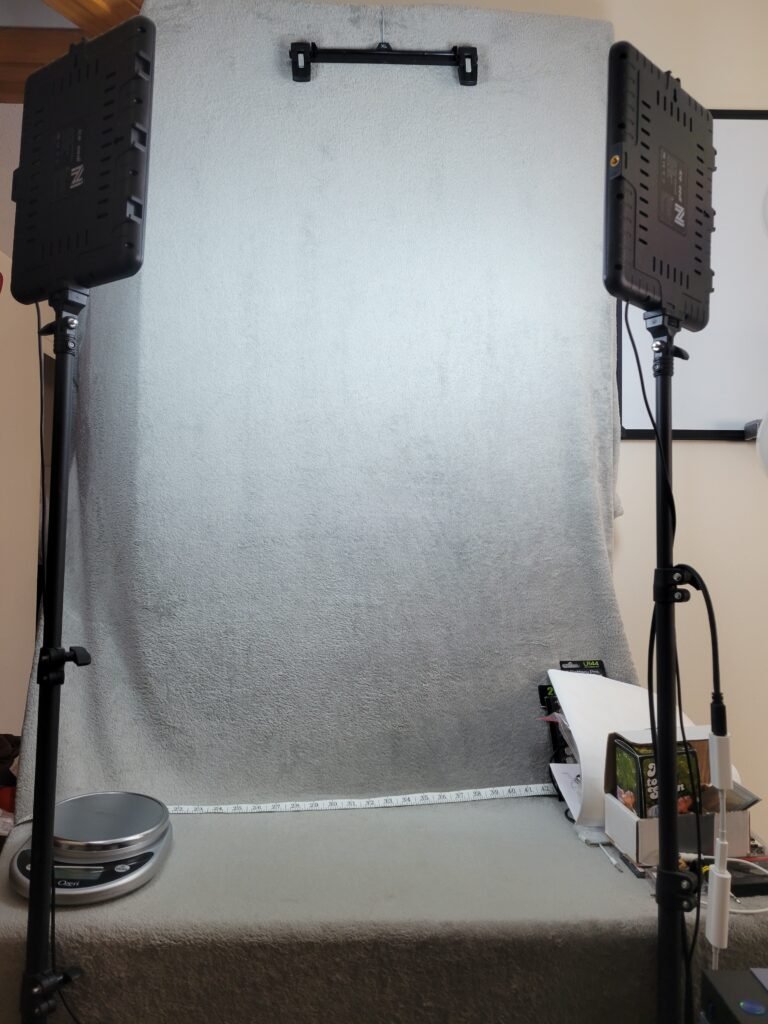
Taking clean, consistent photos is one of the most important parts of selling on eBay. Over the years I’ve simplified my setup into something anyone can copy at home. Here’s the exact photo setup I use every day.
Good photos can help build buyer confidence before they ever read your description. They’re one of the easiest ways to make your listings look more professional without spending a lot of money. My goal has never been to build a photography studio—it’s simply to create clear, consistent images that accurately show the item.
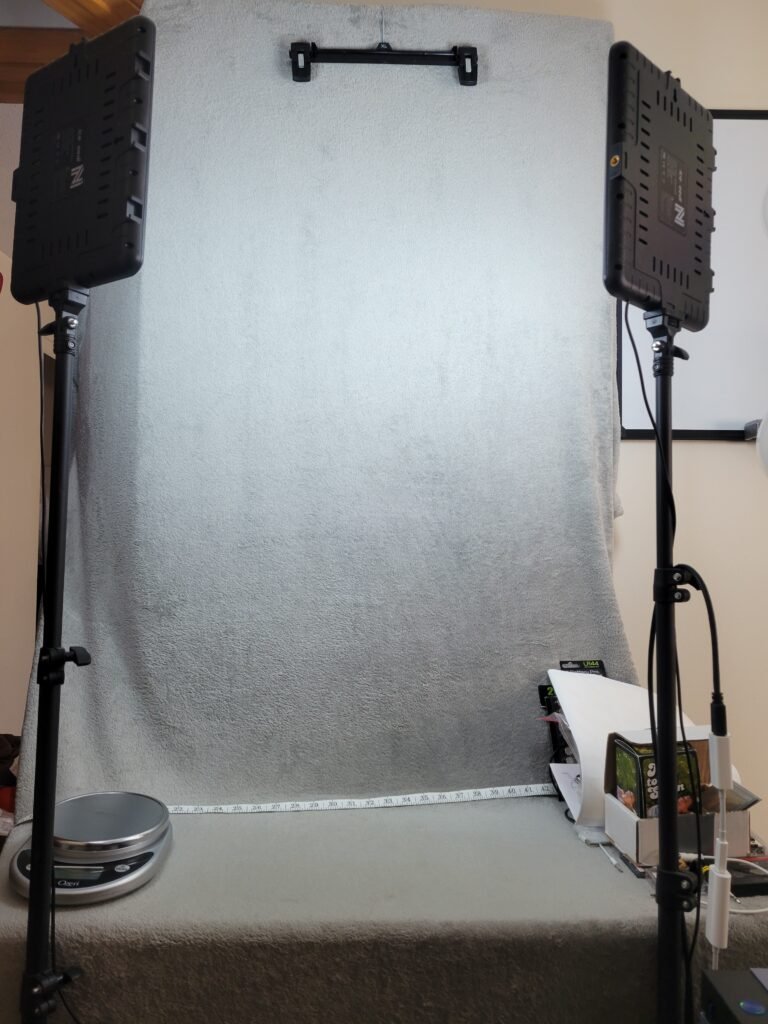
This is the exact setup I use to take clean, consistent product photos for my eBay store. I’ve draped a gray blanket over a door for a smooth, neutral background. Two soft LED panel lights help eliminate shadows, and I include a tape measure in each photo to give buyers a clear sense of scale. It’s simple, affordable, and effective.
As an Amazon Associate, I earn from qualifying purchases. The links below are affiliate links, which means I may earn a small commission if you purchase through them — at no extra cost to you.
These are the tools I use to take consistent, professional-looking eBay listing photos:
Equipment I Use
- Gray Fleece Blanket – Draped over a door to create a soft, neutral background that keeps attention on the item
- LED Panel Lights (Set of 2) – These bright but soft lights reduce shadows and make the details pop in every photo
- Digital Scale (similar) – For accurate shipping weight and quick photos of item weight if needed
- Tape Measure – I include this in most shots to help buyers see the item’s exact size
This simple setup has helped me take better photos faster without a full studio or expensive gear. You can start with just a few items and upgrade later. The important part is consistency, not expensive gear.
Once the photos are finished, I move directly into my listing process. Having a consistent workflow saves me much more time than constantly upgrading equipment. If you’re curious how I go from photos to a completed listing, check out My Simple eBay Listing Workflow (From Item to Listing).
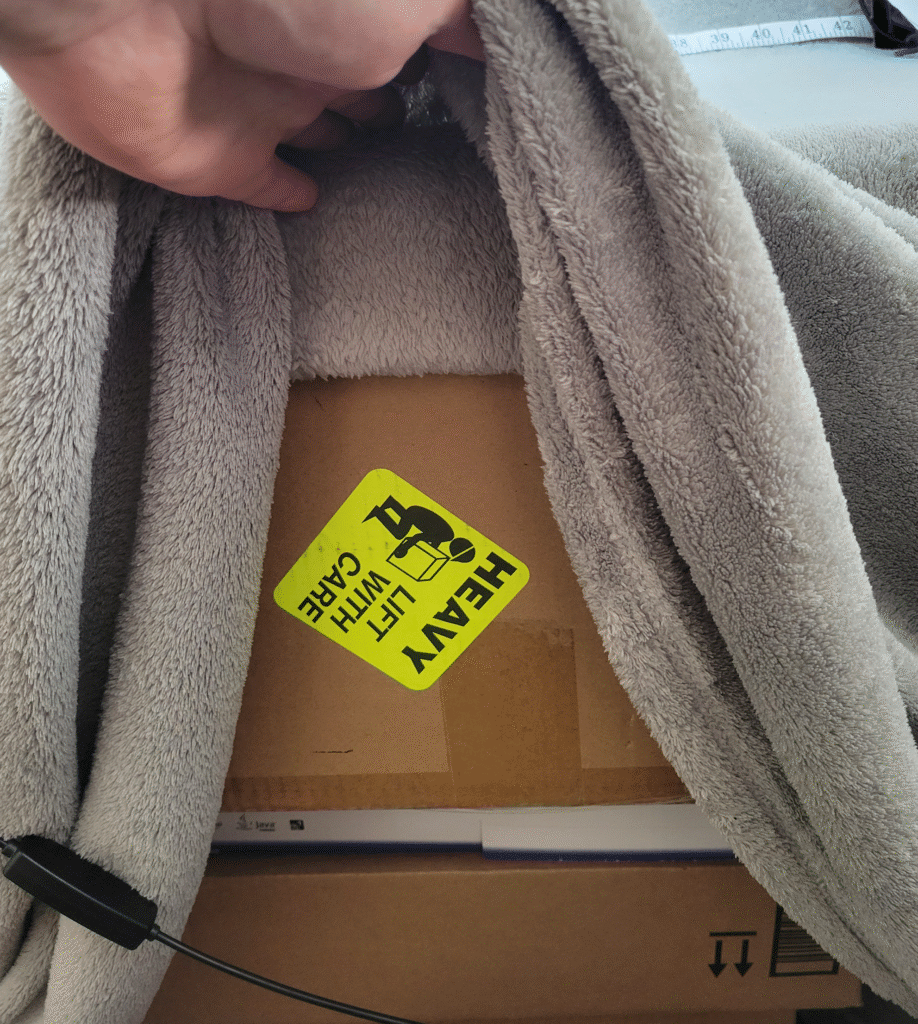
What’s Under the Blanket?
Underneath the blanket, I’m just using a few empty cardboard boxes to build a simple photo platform. This lifts items up a bit, makes them easier to light evenly, and keeps them centered in the frame. You don’t need fancy risers or gear — just reuse what you already have. It’s cheap, stable for most items, and it works.
One thing I’ve learned over time is that reducing friction is more important than having perfect equipment. When everything stays set up, I’m much more likely to list items consistently instead of putting them off. I talk more about that in My Actual eBay Setup (The Tools and Layout I Use Every Day).
I’ve been selling on eBay for a couple of full years and have now passed 3,800 items sold. My store started small, but over time I’ve learned the tricks that help listings stand out, ship smoothly, and actually make a profit. I created Reseller Shelf to share those lessons — from simple photo setups to shipping tools and inventory hacks. Whether you’re brand new or already reselling, my goal is to make your journey easier.
I’ve also learned that good photos are only one part of making consistent sales. Choosing the right items in the first place is just as important. If you’re still deciding what to buy, you might enjoy reading What Actually Sells on eBay (Real Items That Make Money Fast).
The photo setup is only one piece of the process. Once the pictures are finished, it’s time to pack, organize inventory, price the item correctly, and eventually ship it to the buyer. That’s exactly what the rest of this series covers.
New to Reselling on eBay? Start Here
If you’re new to reselling, these articles walk through the exact process I use every day—from taking photos to shipping orders.